Monday, November 28, 2016

Love my rulers!

Rulers: there are LOADS of them out there. And they're not cheap. But I have to say I love them. This one was around $25 and I think I've gotten my money's worth from it.
This is from Creative Grids ....it's the 45 degree 2-1/2" HST ruler. You can cut 2-1/2" strips and smaller...and you can cut PILES of triangles quickly and accurately. I also use it to cut the 45 on the end of my binding strips. NO I DONT GET PAID BY ANY RULER COMPANY. But when a tool works, I like to share that. For my scrappy civil war quilt I need almost 200 2-1/2" HSTs (2" finish size)
To make them easy to chain stitch, cut a 2-1/2" strip from my red and one from my greige. Lay one strip of each with right sides together (the picture has them the wrong way) and cut the triangles. You get 10 sets with each placement of the ruler. Just stitch on the long side...1/4" seam. Do one after the other then cut apart and press all of them. I do seams open sometimes...seams to the dark sometimes....depends on the quilt.
I've used this ruler for SO MANY QUILTS...seems this is one of the most popular HSTs used in blocks.
I made CORN AND BEANS block...LADY OF THE LAKE ....INDIAN WEDDING RING...CROWN OF THORNS...HST borders....and much more with this one.

Tuesday, November 22, 2016

Sewing for my bedroom

Stitched some pillows for my bedroom today....I needed a pop of color. This fabric had my favorites in it...coral, aqua, golden cream and gray beige. I only bought a 3/4 of a yard but that was enough for these two. 

My next project (after the pile of WIP are done of course!) is to find fabrics to coordinate with this floral and make a quilt for my room. Yes, I have a pile of quilts but NONE match my new room. Amazing I know!

Thursday, November 17, 2016

Tutorial: Crochet a rag rug from strips

Time for a new rag rug for my back door...the old one was made about 6+ years ago...its getting worn. Original rag rug picture. I'm just starting to collect the strips needed as I sort and organize my fabrics. A few days ago Trina asked me about the pattern to make one...you don't need a pattern. It's super simple as long as you know how to crochet.

 Start with 1/2" fabric strips. Selvage pieces work too. The longer the better so trim the selvage off your larger pieces of fabric before cutting quilt pieces. Save those till you have a jar full of strips.


I'm working with these just to show how to make a rug but this isn't anywhere near enough the amount you'll need.
There's two ways to hook your strips together.. The first way:
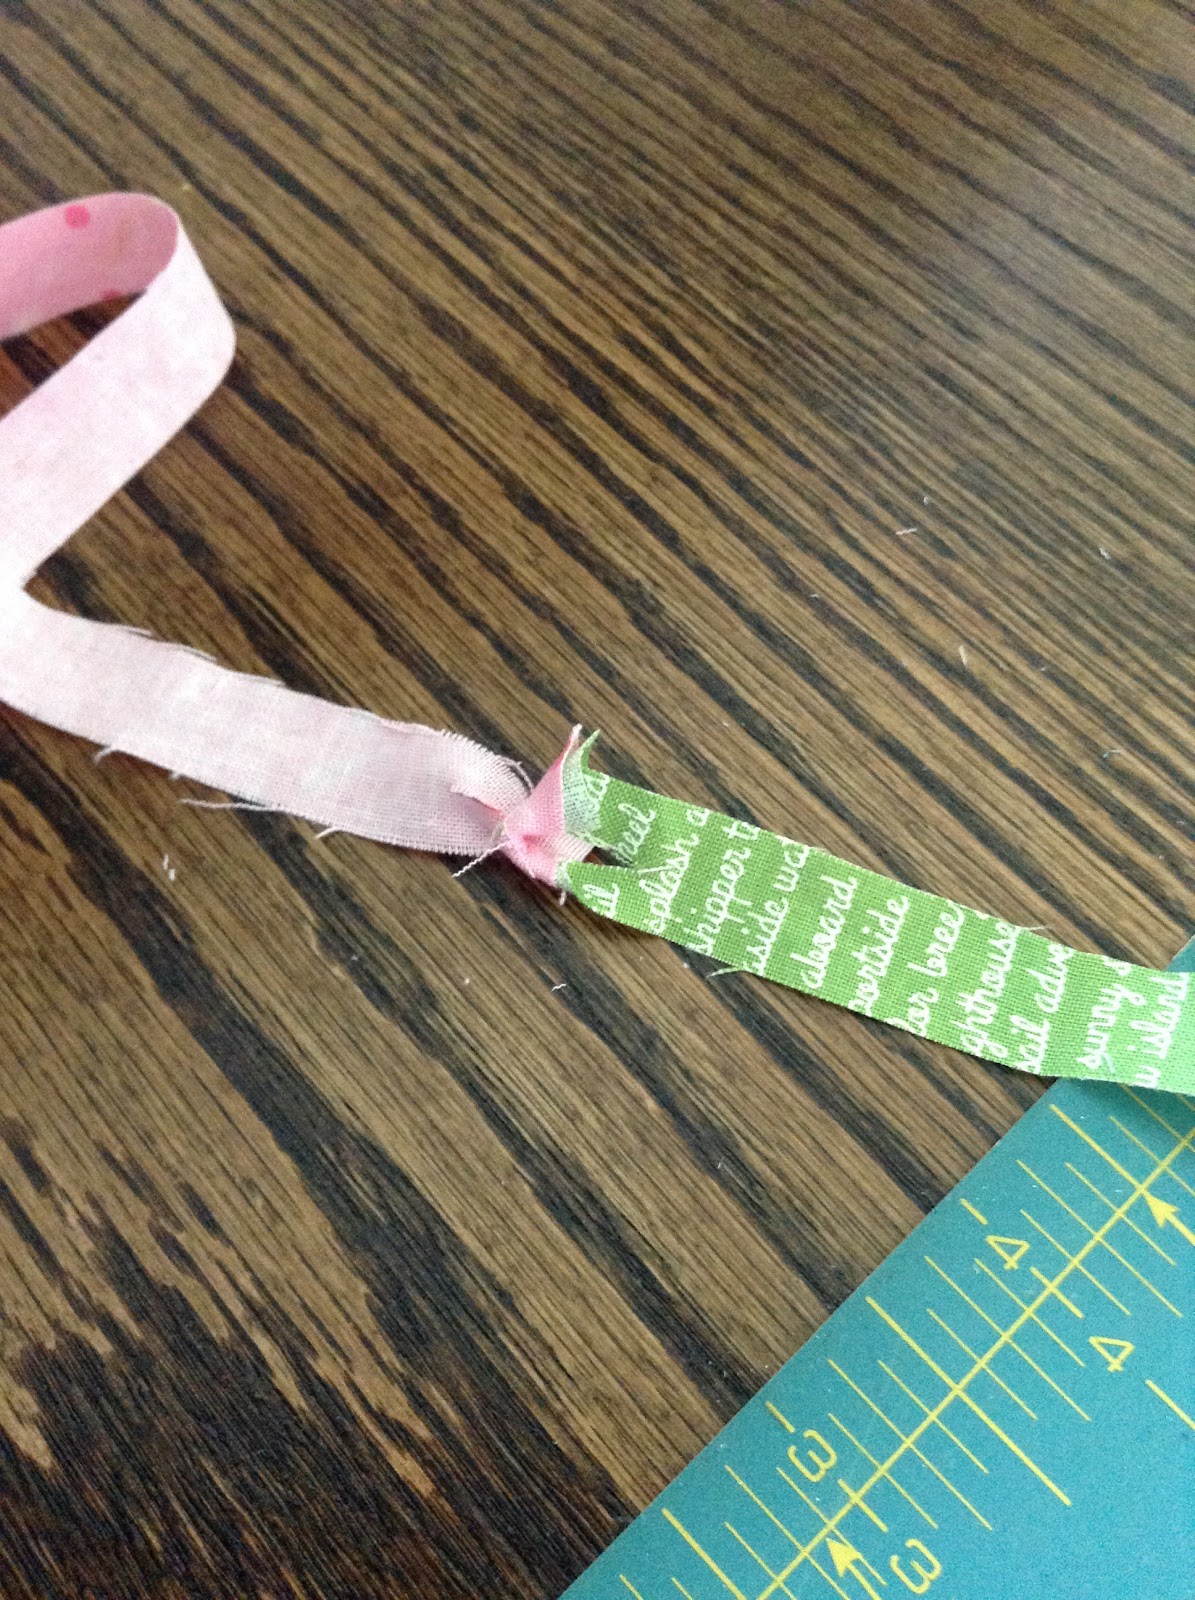
Cut slits in both ends of each strip.


Tuck a second strip into the of the first strip.


Then tuck the end of that second strip through slit of the same strip and gently tug until they knot together like below.


The second way which I prefer is to overlap the ends ....stitching back and forth ....add another to the other end...keep going. Chain stitching these is fast. Cut them apart when you're finished stitching all of them and roll into a ball.
To crochet the rug use a large hook. Mine is size K.

To get a small rug (44"x27" is what I'm planning on) chain about 40. I measured my chain...it's about 18". I figure if I add 12" all the way around I'll end up with approximately 24x42...plus or minus.


After chaining turn and single crochet (sc) back through all your first 40 or so chains. At the end chain put 3 or 4 or 5 sc to create the turn ....then SC back into those original 40 stitches. This is creating a large flat oval that you will just keep going around.

When you get to ends just add extra sc to keep it flat. Sometimes in the start I'm putting 2 or three into one. These added stitches just keep your rug from curling up. You'll have to use your judgement on this...curling up?...add...going straight?...just do sc. I continue going around and around until I have the size I want.

Above is the turn where I'm starting to add extra sc to keep it flat.


Here's where I did my figuring to see if I would get the right size. You could also do a circle.


Tuesday, November 15, 2016

Scrap organizing

You ever stand back and look at your fabric collection....and just SIGH...not the good sigh like wow what a great bunch of fabrics....no, the other kind.. The "Am I ever going to be able to use all this fabric?" The "when I'm gone someday, are my kids going to be overwhelmed my stash?" Or the " can this out of control stash be organized...cut up...used?" 
Well, that's what I was saying to myself as I stared into my sewing room closet yesterday. 


So starting with this box of leftovers from my Farm Girl Vintage quilt....I'm cutting...chopping...sorting. I started a box with 4-1\2" strips...2-1/2" strips...and 1-1/2" strips.
When I searched my favorite scrap quilt patterns I found most used 2" HSTs, 2" squares, 4"HSTs and squares and 1" strips and squares. So this whole box is getting chopped ...unless it's a really large piece or if it belongs with civil war or 30s (I keep those separate).


Some of the 4-1/2" strips were cut into triangles right away. I'll put a stack in a tin for the next scrappy.

And if you know me at all, I gave a hard time throwing any scraps away....guess that's what got me into this pickle. So when a strip was too small to cut into a 1-1/2", I cut 1/2" strips...and save them in this cute jar. Pretty to look at but there's a purpose here. My back door rug is looking a little worn so it's time to crochet a new one. As this jar fills I'll attach the strips together, roll into balls and store the balls in a basket. Sometime after Christmas I should have enough to make my new rug. 


Sunday, November 13, 2016

Modern Solid Sampler quilt ready to baste

I've been working on my civil war quilt a lot lately and needed some COLOR! This scrappy solid quilt is ready for quilting so I'm taking a break from dark colors to do this. 
Originally I planned to add a border but I've changed my mind...it's big enough for a lap quilt and that's all it was meant to be. This was just a way to use up blocks that I auditioned... If I wanted to try a block or quilt pattern, many times I make one block. If I like the process or technique I start the quilt. I've been making my tester blocks in solids knowing that someday I would have enough for a modern solid sampler. There's some that were so bad they didn't even make the cut for this quilt...and one in here that was soooo time consuming I only made 1/2 a block (the red & white block to the left of center).
So onto the quilting....

Thursday, November 10, 2016

Next on my Scrappy Civil War quilt

Finished up the border finally and now I just need to add something to finish the quilt off. It seems like it needs another burst of the red and grayish tan.....so I think I'll repeat the inner HSTs ...the ones that surround the spools. I won't think I have anymore of that particular red but I'm sure I can find something close. It's 72" sq right now and adding the next border will bring it to about 80" sq. That should be a nice size to end up with.

Tuesday, November 8, 2016

What a difference color value makes...

The border has been UNSEWED (big pain!). Look here for the picture BEFORE REMOVAL! I spent some time making all the 16 patches....32 of them. That's done so I recut triangles pieces to border them...got rid of the blue...used this dark green instead...kept the gold. I like how these flying geese stand out now...the border is much more interesting. Isn't it interesting the change in a quilt or block with a switch in fabric?


Thursday, November 3, 2016

Decisions, decisions!

I spent the last couple of days making these blocks....below....then added the first set to my quilt. Not happy. It seems to be missing some dark so I ripped it off and am trying to figure out what I want. I'll probably add a little dark border then add this row back on. Black is too dark...navy and red are too bright so dark green or brown. 

I'm loving my new sewing area...Al and I are shopping for some under the counter lighting. That's the one complaint I have. My eyesight isn't what it used to be. 


First quilt finish this year

This is the first finish of 2023!  I wanted to get one of two "great niece " quilts finished. The top was made last year as part o...