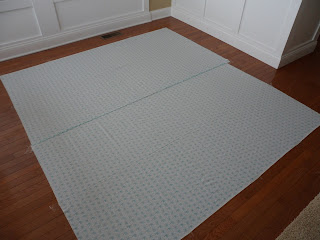
Yesterday I pin basted my newest quilt... a summer one that bright and cheery in blues, lime, turquoise and aqua. When I teach machine quilting, I talk about how to pin baste at home on the kitchen floor and thought maybe I should do a tutorial. Pin basting on tables in easier on the back but this method works for me so I stick with it. 
First you need to clear a large space on the floor. You can do this on carpet also but put something over the carpet (large piece of cardboard, etc) so that the pins don't hook onto the carpet loops.
Once the floor is cleared I tape the backing of the quilt to the floor using packing tape. Make sure the backing is well pressed and pull it smooth. Don't pull it so tight that it springs back when realeased later... just tight enough to make it smooth. This is place RIGHT side down.
Here's a picture of the corner that's taped. I turn one edge of the tape under so that it's easy to pull off later.
Now you can spread the batting over the backing, again smoothing it out without stretching too much.... just get out the lumps. The top goes on next, RIGHT side UP. Center the quilt top on the backing (you might have to keep peeking) so that the seam in the back is straight. If you have a striped backing, make sure the top is running straight with that also. Smooth out any lumps and make sure borders look nice and straight BECAUSE what you see is pretty much what you get. If it's pinned crooked, it will be quilted crooked.
Now it's time to start pinning. If you have a wood floor like I do, you might want to slide a large poster board sheet under the backing to protect the floor as you pin... or use your largest cutting mat.
Here's my pile of pins (above). I don't close them when done... just pop them into my pin container and then dump them out when I start pinning again. See that wooden tool? I wouldn't do this without it.
It helps close the pins so that you don't have bleeding fingertips. A spoon or a crochet hook can be used also but I like this the best. Available at quilt shops (Hearts to Holly has it... ask for the "antique" basting tool.. inside joke:) It runs under $10 and is WELL worth it.
Pin A LOT! Put in enough pins so that you can't lay your hand down without touching a couple.. probably every 4" or so. Make sure to pin right to the edge and the CORNERS. You don't want the backing flipping away from the top and batting while you're quilting. It'll get stitched folded over and you'll be ripping out stitches... no fun. This is experience talking!
Seems like a lot of pinning but it's worth it. I used over 500 pins with this quilt (76 x 84)
Once it's all pinned, I trim away some of the excess leaving about an inch of batting a backing hanging over. You don't need more than that. The quilt shrinks up as you quilt but it shrinks evenly.. all three layers together. Remove the tape and you work around the edges trimming with scissors.
Roll it up from both ends to meet in the middle. It's now packaged perfectly for your sewing machine.
Next I'll do a tutorial on machine quilting using your domestic machine. Mine is an older Pfaff and I'm able to quilt most of my quilts at home. This one above is about the largest I do. I use a thin cotton batting to keep it flatter... easier to work with. PLUS cotton sticks to the cotton backing and quilt top so that I don't have shifting and puckering as I quilt.


