 I'm going to add the directions to this block (12") the next time I'm online. It's really easy if you have the Tri-rec tool.
UPDATE (4-16-12):
I've stiched up the Pat's Pines block so that I can post a tutorial for anyone that would like to make it. You'll need to purchase the Tri Tool/ Rec Tool. These come together and are wonderful acrylic templates for making all kinds of blocks and rows that use triangles.
For my pine trees, I used up scraps of dark green. I had lots of 2-1/2" strips so I stitched three together to form a long 6-1/2" strip. I trimmed this to 5-1/2" wide. If you'ld like you can just cut a 5-1/2" strip of fabric. The strip length I used was half of a WOF (width of fabric) or about 21" long.
Pat's Pines Block Tutorial

Green: (1) 5-1/2" wide strip (mine was a scrappy strip)
Background: (1) 5-1/2" wide strip AND (2) 2-1/2" strips
Brown: (1) 1-1/2" wide strip
Red: (1) 2-1/2 x 2-1/2" square

From the strip of green, cut FOUR trees by using the Tri Tool. Line up the 5-1/2" line at one edge, the top should line up on the other side, and cut the two angles. Flip the tool to the opposite end to cut another. Repeat cutting until you have 4 trees.

Fold the 5-1/2" background strip in half, right sides together and cut 8 triangles using the Recs Tool. Line up the 5-1/2 line on one edge and cut the two other sides. There is a TINY little extra cut at the tip that you cut also. Seems like a little thing but this little clipped point helps to line every thing up for sewing.

Using one of the "trees" and two of the background triangles, stitch the sides of the tree to for a 5-1/2" square block.

Here's that extra cut you made with the Rec Tool. This makes everything line up nicely.

Here's how the second seam line up. You should be stitching your 1/4" seam so that you stitch right off the end in the V made by the two pieces.

Now stitch together one 2-1/2" background to the brown strip and then add one more 2-1/2" background to SANDWICH the brown between them.
Cut off FOUR 2-1/2" slices.
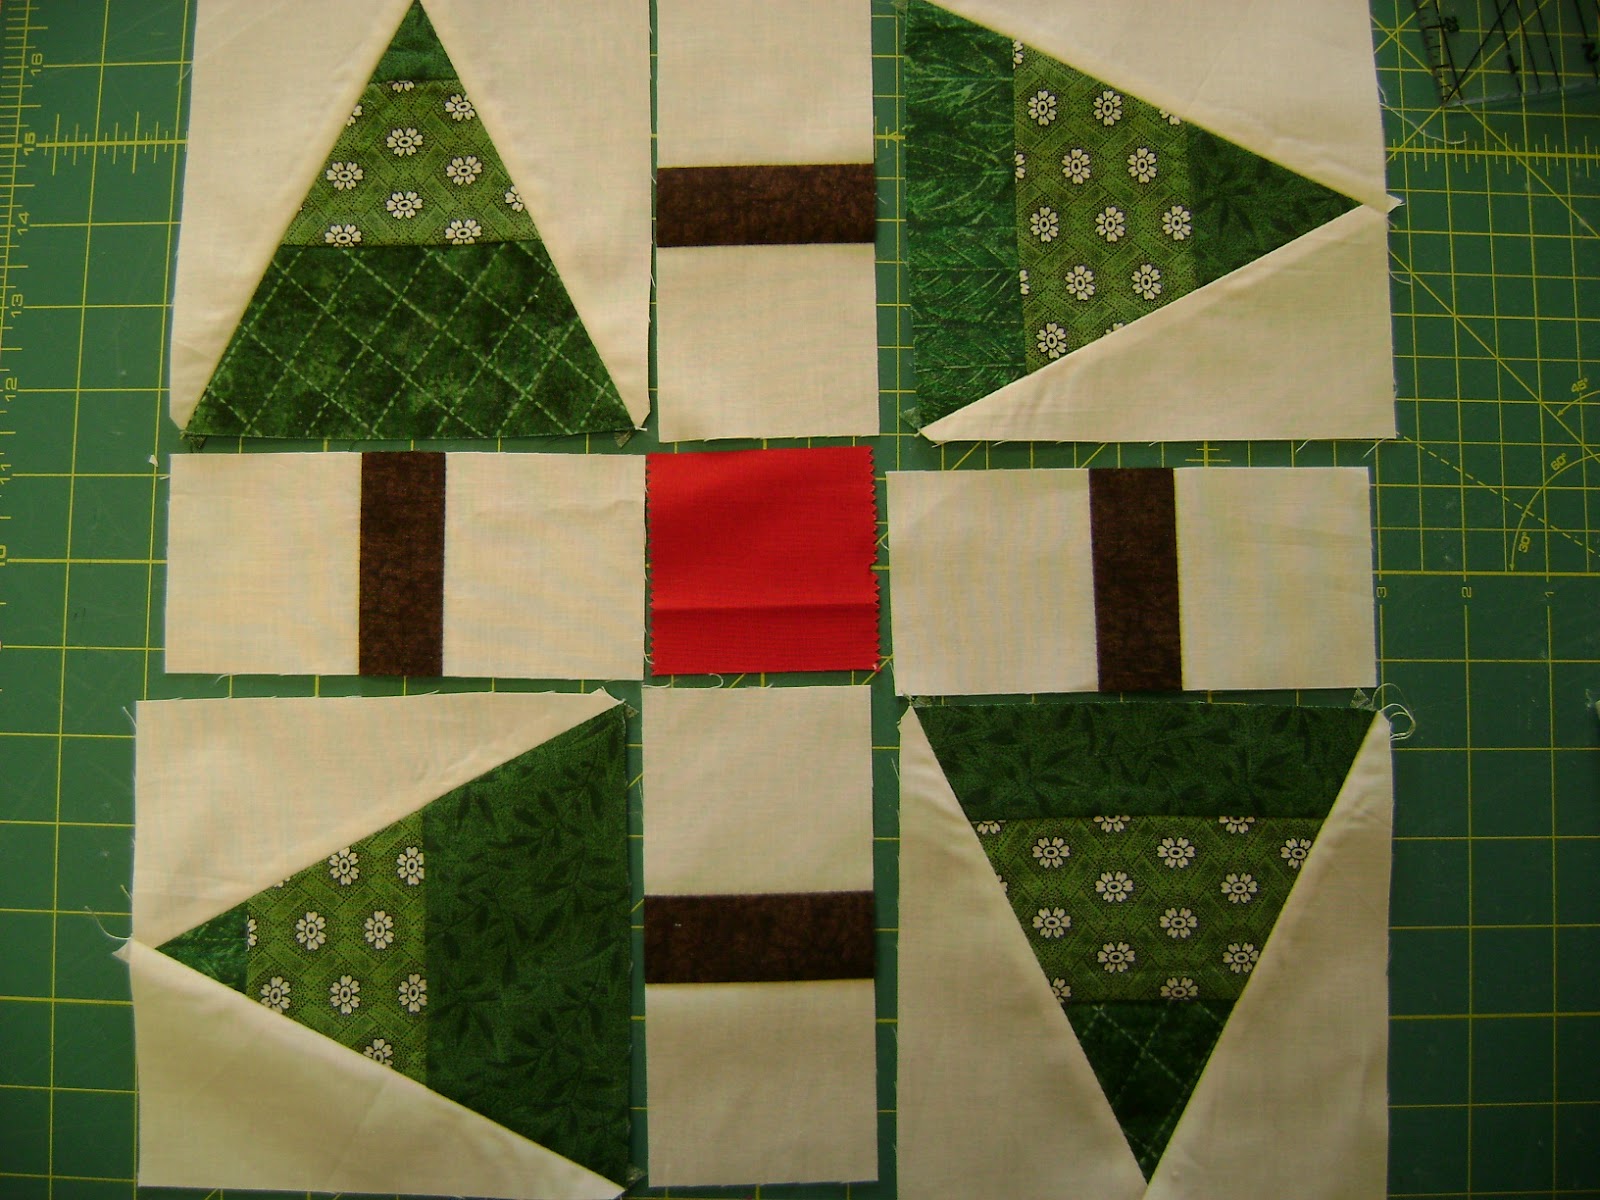
Lay out all of your pieces to look like the picture above. You have 9 pieces. Put this together as you would any 9-patch block.

On any 9-patch block, I press the seams out for the outer rows (top and bottom) and in for the inner row. This helps to "lock" my seams together when I complete the block. Here's my idea for finishing up the quilt. I would probably put a sashing between my blocks... maybe a 1-1/2" to a 2-1/2 wide....then border the whole thing a few times. The one below would be a lapsize... use 20 blocks (4x5) or more for a bed size.


4 comments:
I love your barn quilt, Pat's Pines... your DH did a wonderful job!
I'll be praying for your mom... take care of yourself too!
Deb my friend, you & your Mom have been in my prayers. I am so sorry she is going though such a difficult time.Hugs, to you & her.
You take care of yourself as you travel to be with her.
Your barn is simply wonderful!!!
Thank you for the great tutorial for Pat's Pines! It was clear and easy and my blocks came out perfect!
Thank you Laura, for letting me know how the tutorial was.. it's nice to have feedback. I'd love to see your finished blocks.
Post a Comment