Saturday, October 19, 2013

Quilts and Veggies at the Farmer's Market

Had to add one note:
Hearts to Holly Quilt shop (my fav) has a BIG 6th anniversary sale going on today.
30% off RULERS, BOOKS, THREAD, NOTIONS and FABRIC (1yd or more) PLUS FQ are buy 6 get 6!!!!!  

Al and I had a taste for fresh bagels on Thursday so we went to the farmer's market in town. Since the weather is now starting to turn cold, they've moved it indoors... into the back area of the library. I couldn't resist taking pictures of the beautiful quilts that were a backdrop to the fruits and veggies.

Some of these quilts are for sale... some just for show... but all very  beautiful.
 This one (below) is done by an artist friend of mine... she's VERY talented.
 I love this TREE wall hanging below...  wouldn't that be pretty in an entry room?
 This one was hard to get a picture of but it's scrappy and fun. Love the color choices in the blocks. I would like to start a scrap quilt soon.... nice inspiration.

Monday, October 14, 2013

Solved a problem :)

A few days ago I wrote about a problem I was having with my bobbin thread popping up and showing on the top of my quilt as I was quilting. I have to say, I tried EVERYTHING to fix this... different thread on top, different thread in the bobbin, cleaned the machine, oiled the machine, adjusted the top tension, then VERY RELUCTENTLY adjusted the bobbin tension... nothing worked.
 See that green thread showing on the white?... AHH*&*)@#!

Last night (or VERY early this morning), I was lying awake when it hit me... I had just changed the needle because there seemed to be a burr catching my fabric... and the only needle handy in my case had been a size 14. That's large compared to what I usually use.

So this morning I changed to a size 10 or 11 (somewhat smaller). THAT was the problem!
The hole was too large and it was letting the bobbin come to the surface.

WELL, since almost all of my border was done with this green showing, I left it and just started quilting some more... no way was I going to RIP all that stitching out.
But boy does the quilting look nice now..


This isn't an important quilt... just one I was making to try out a new pattern. It'll probably be for a child/baby to play on. So now on to the binding :)

This is another project I'm considering.. after I finish up a few UFOs.
The book is called Japanese Taupe Quilts. They're neutral quilts. I can't say I like the oriental look but I do like how modern and clean some of these look. This book has a pattern for a table runner and also some nice sampler quilts.

I've started collecting some of the Japanese fabrics plus other neutrals that I think will fit in. I found the plaid on the bottom edge of the picture at a resale shop (it was a shirt for 99 cents!). It's a cotton/linen weave and really is a beautiful color. This picture doesn't do it justice. Below are some more fabrics I found to use in my project. 

And here's what I did with some hexagons that I cut out of solid to try out the new Hexagon Template from Creative Grids. You can cut up a pile of hexagons in no time.
This will be made into a pillow. I stitched them all together and have been trying to decide whether to cut more or to work with what I have. Since I have a TON of started projects, I decided to just finish this up and it's a perfect size for a bed pillow. I'll post a picture when it's done.
I might add embroidery or some other details... maybe oversized quilting..
Hope everyone is enjoying this beautiful fall weather. Our leaves up here in northern MI are peaking. 
Winter is just around the corner ...OH, what a depressing thought! Forget I said that.

Thursday, October 10, 2013

Taking a day trip through northern Mi to see the Quilt Barns

 
Today we (some friends from Charlevoix and me) went to Traverse City's Mission Peninsula to see the barn quilts. There are 15 of them... 14 in the printed brochure and one new one on a house.
 
I love barn quilts and have one on our barn... Photo of it.
 
Here are the ones we saw today plus a few extra pics...


 We couldn't get any closer to this one... beautiful scenery though.

 This one above is not on the trail... must be newer than the brochure.
 Check out the cherry window boxes (this is cherry country up here).


 This view is across the street from the barn above it... if you've been to TC but haven't been here, it's really worth the drive. And below is a little dragonfly that one of my friends picked up... flew away before we could get any more pictures of it... SO CUTE!!


This quilt was WAY up high in the antique store/quilt barn (third pic from the top). The owner of the shop says it's all velvet... sure was beautiful!
 Couldn't pass up a chance to take a picture of this little shed/barn... aren't the chickens great?!
And now I'm home again, enjoying the beautiful red tree out my doorwall. This tree struggled for the first two years but now it's lit up like a fire... just love it.

Wednesday, October 9, 2013

Quilting and making pierogi

Today I got a little quilting done on one of my smaller quilts. I'm having a little problem with the bobbin thread showing on the top. It's not TERRIBLY obvious but enough that it's bugging me. I tried changing the bobbin thread to something thicker, changed the tension (tighter and then looser)... but nothing has helped. I'm doing FMQ (free motion quilting) on this quilt and when I do a point or circle around backwards, that's when it REALLY starts to show.
 
Anyways, I decided to quit for a bit and do some cooking for my company that's coming on the weekend. We're going to have an Octoberfest... pork cutlets, pierogi, applesauce, fried red cabbage, homemade rolls... BEER :)
Today I made the pierogi and thought maybe I should share the recipe... they're really easy. These are the cheese ones. If you're a fan of Polish food like me, you'll love these.
 
Here's the how-to in pictures. I'll put the recipe at the bottom.
 
 Need butter, sugar, eggs and a pkg of farmer's cheese.
 
Mix it all in a food processor till creamy.

 The filling is done... put it in the fridge till your dough is finished.
 
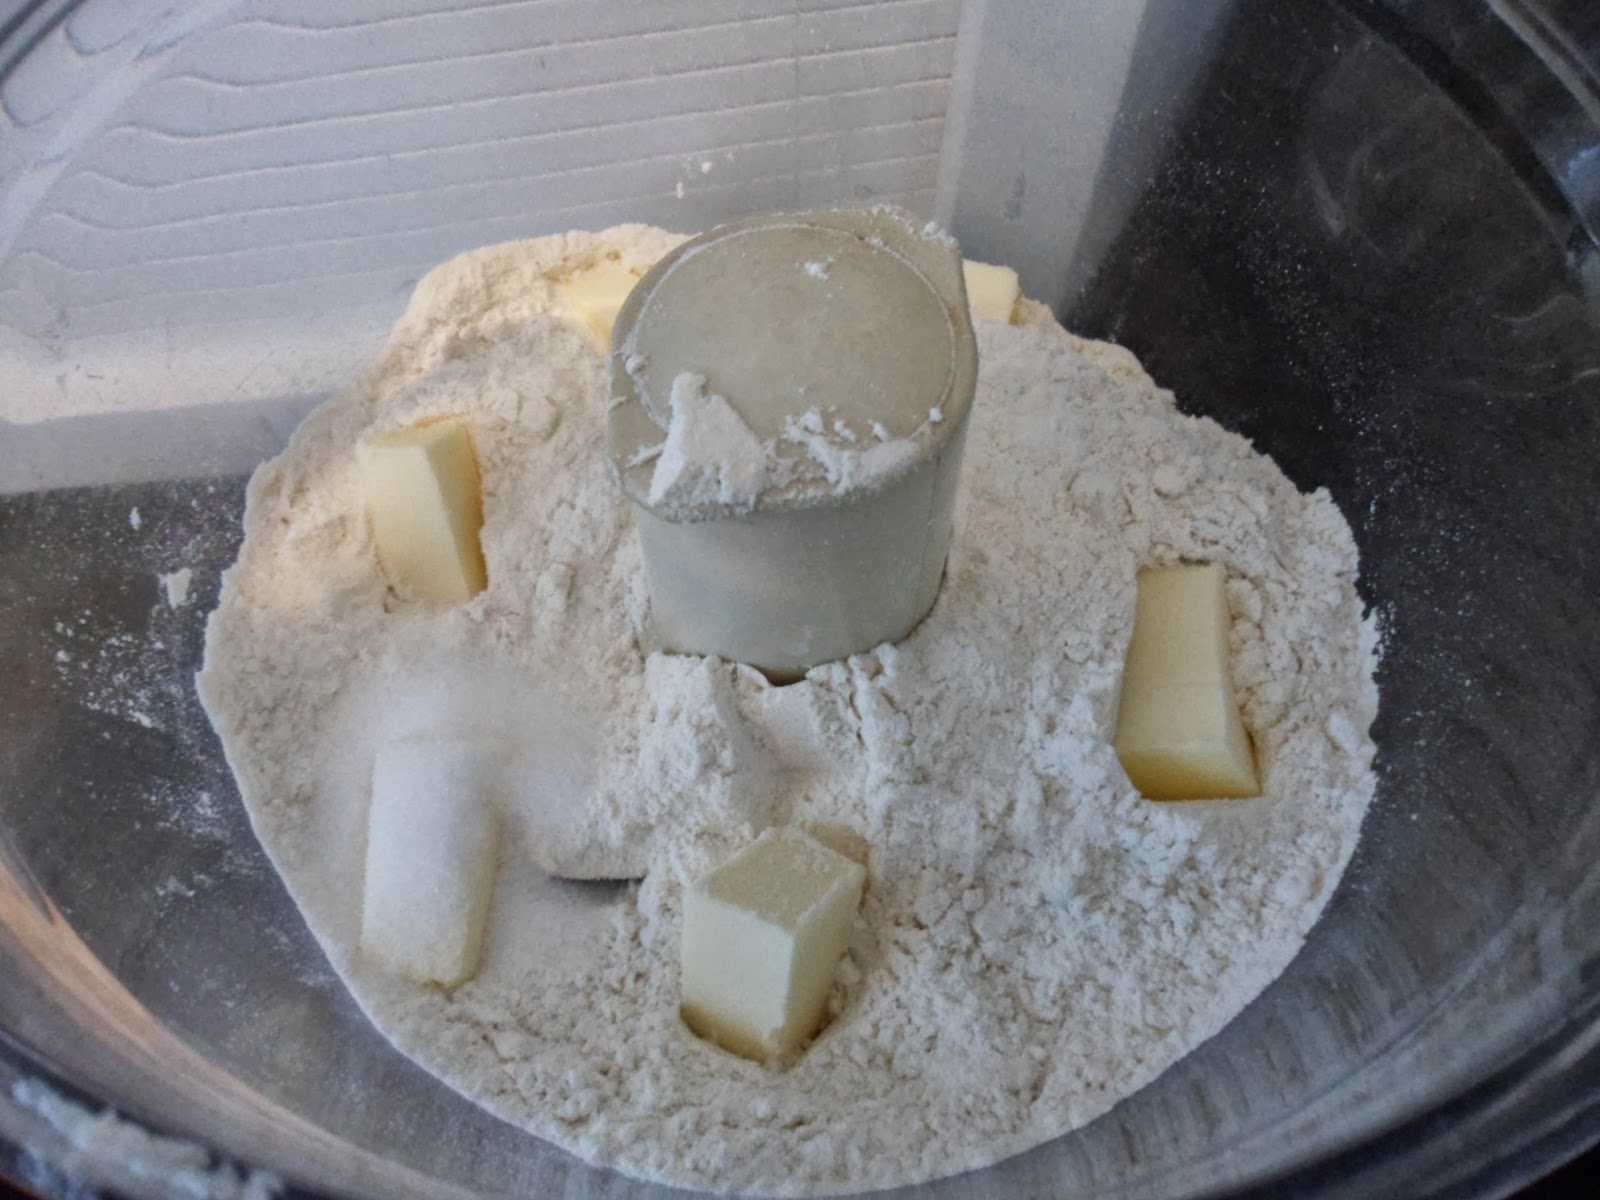
Dough is made of flour, eggs, butter, oil, salt and sour cream.
Put the flour, butter and salt in the food processor (don't even have to clean it out from the filling, it's not going to matter).
 
 
Mix the three together then add the rest of the ingredients.
 
Mix till you have a dough... if you need to add a bit of water (too dry) or flour (too wet), add that and process till it forms a nice ball. 

 I split the ball into 6 or so pieces and flatten them. Then run them through a pasta maker (or you could roll them flat with a rolling pin and lots of flour).
 This is my trusty pasta maker from '81... use it all the time.


 Once it's rolled out to a #4 thickness, cut circles out with a large biscuit cutter (3-4").
You should get about 27 rounds. Put a rounded teaspoonful of the filling on the middle of each round.
Put some water in a little bowl and wet the edge of each circle of dough to help when sealing. Fold circle in half (the water will be a glue), keeping the filling away from the edges and press.
Press the edges together really well... you don't want your perogi opening up when they boil.
 Get a pot of water boiling... drop in about 6 or 7. When they float to the top, time them... 3-4 minutes and they're done. Scoop them out, drain, and drop in the next 6 or 7.


 The cook has to make sure they're okay for the party, right? ;)
OHHHH, YEAH!
 
Cheese Pierogi
 
Cheese Filling:
1 pkg farmers cheese (about 1/2 lb)
2 large eggs
1-1/2 Tablespoons sugar
2 Tablespoons salted butter.
Mix together in food processor.
 
Dough:
2-1/2 Cups Flour
1 Teaspoon Salt
2 Tablespoons Butter
2 Large Eggs
1 Tablespoon Veggie Oil
1/2 Cup Sour Cream
 
Mix first three ingredients in food processor. Add next three until it forms a ball. Roll out dough to a number 4 on a pasta machine. Cut into 4" circles. Dampen edges of circles and put 1 heaping teaspoon of filling on each circle. Fold in half and seal well. Drop into boiling water, 6 at a time. When they float to top, set timer for 3 or 4 minutes. Drain in colander. Fry in butter or freeze and fry later. Serve with sour cream or apple sauce. MMmmmmm!!
 

Tuesday, October 8, 2013

Shopping, Baking and stitching

Today I worked and of course I had to buy some fabrics... Came home with this bundle of solids and a yellow dot, plus some Dr. Seuss.

I'm working on a Dr. Seuss hexagon quilt and decided I needed a little bit of a dot in it... that's the yellow...PLUS, the back is going to be split into two and then I'll strip piece all my scraps to make a vertical row down the center. I'll add these big squares of Dr. Seuss in with the strips.

Here's the cookies I was baking. These are Oatmeal Peanut Butter...mmmmm. They're crispy and buttery with lots of peanut butter flavor.  Want the recipe? Here ya go:

Peanut Butter Oatsies

1/2 cup salted butter (1 stick)
1/2 cup shortening 
3/4 cup packed brown sugar
1 cup white sugar
1 cup peanut butter (I use part Jif smooth with part almond butter)
2 large eggs
1 teaspoon pure vanilla (or 1/4 teaspoon almond extract)
2 cups old-fashioned oats
1-1/2 cups flour
2 teaspoons baking soda
1/4 teaspoon salt
 
Preheat oven to 350F.
Beat butter and shortening till light. Beat in sugars then peanut butter. Beat in eggs, one at a time. Add vanilla, mix.
In a separate bowl, mix oats, flour, soda and salt. Add to mixer, beat till combined.
On baking sheet, drop by heaping teaspoonful, 2" apart. Bake for 13 to 15 minutes till lightly browned. Cool on sheet before transferring to wire rack to cool.
Makes 4 to 5 dozen.

Latest projects

  I've been working on 4 quilts lately. This yellow one was completely finished a fews days ago.  This "square in a square " q...