Scrap Happy Hexagon Quilt
I had a pile of 1-1/2" scrap strips and needed a quilt to use up some (so that I could close the box😂). I guess I could have found a bigger box as someone suggested...
Well, this is the quilt I came up with. It uses the strips, a solid background and one template. (This picture, above, is sideways)
Today is NATIONAL QUILTING DAY so in honor of that, I'm posting a FREE tutorial here to make this quilt.
This is a Fons and Porter template that measures 6-1/2' high. All sides are equal (60° angles). Any 6-1/2" equilateral triangle template will do.
I DO sort my scraps a bit. I make my scrap quilts using LIKE scraps...either all brights or all muted or vintage...I rarely mix civil war, for example, with brights. I just dont feel they belong together. If a scrap doesn't FEEL right to you, dont use it. And if you really don't like a scrap, get rid of it...you probably won't like it in your quilt.
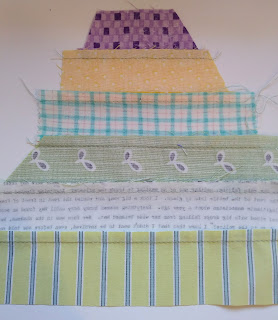
So to start I dig through my scraps and sew the strips together until i have a tall enough piece...i lay the template on it once in a while to make sure everything is long enough.
Another option if you have LONG strip pieces, is to sew them together lengthwise into one long scrappy strip (at least 6-1/2" tall and 8" wide).
After sewing enough strips, press them all one way.
Now cut your triangle pieces out.
The hexagons are made up of 6 of these triangles. Three are stitched together then a background spacer then another three.

The next row will complete a hexagon WITHOUT you doing any Y seams. But pay attention to the direction the triangles are placed.
NOTE: Row 1 & 2 are identical, just flipped. Row 3 & 4 are also identical.
For the background, cut 6-1/2" wide x W.O.F. strips. Cut out triangles using the same acrylic template.
For the edge pieces (beginning and end pieces of each row), you need to cut 1/2 triangles BUT make sure you use the line 1/4" from center so that you have a triangle with a seam allowance. See below.
It takes two rows to complete the hexagons. Each row makes either the top half or the bottom half.
I staggered the third and fourth row by starting with a single triangle...this will create a diamond at the beginning and end of row 3-4. You can do it the same as I did or just repeat row 1 and 2. If you repeat 1 & 2, your hexies will be all in a row stacked on top of each other. Just depends on the look you want.
I'm making 5 large hexies across... So my quilt should be about 70" wide. The hexagons are about 14" wide when finished. I may add an extra 2 rows to get a bit more length ...this will depend on how many scrappy strips I have.
I'll add some extra pictues tomorrow showing piecing of triangles. Right now it's just a bunch of pieces on my "design" floor.
Update:
I'm sewing together row 1. I have five 1/2 hexagons made, a bunch of blue background triangles and 2 background 1/2 triangles (to start and end this row).
If you've sewn triangles together before, you know the points need to stick out and that the stitching is done "ditch to ditch". It's very important to line up the edges correctly.
If you HAVEN'T, go to Google...key in "sewing triangles together". You'll find some helpful videos.
If any part of this process is unclear, just let me know. I'll be happy to add details.


